We advise using WooCommerce if you’ve installed WordPress and wish to operate an online store. It is one of the most popular WordPress plugins because it offers flexible and customisable features, making it a well-liked eCommerce plugin.
WooCommerce is simple to set up, and WordPress installation and configuration only require a short amount of time.
The steps to install WooCommerce on your WordPress site are as follows:
1.Access your WordPress Admin account.
2. Click on Plugins >> Add New.
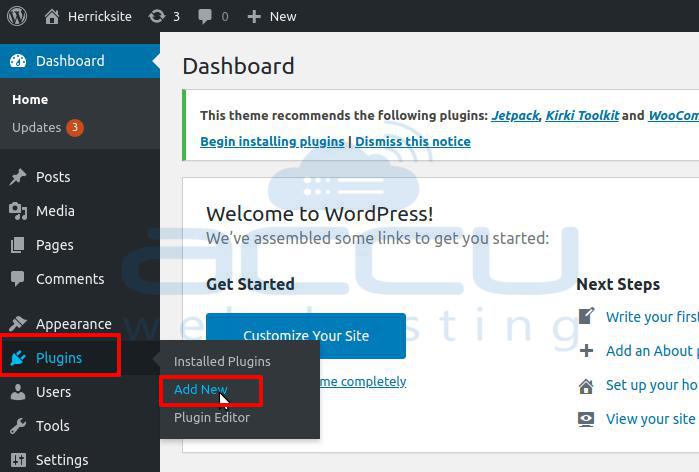
3. Type “woocommerce” into the Keyword field on the right.

4. In the WooCommerce Plugin box, select Install Now.
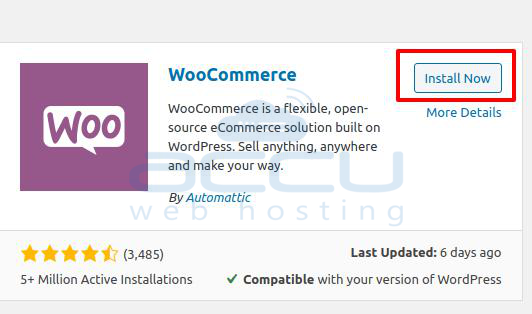
5. Once installed, go to the installed Plugin list and Activate WooCommerce.

6. When you click the Activate button, the setup page will open. Click the Let’s go!button upon completion of all required fields.
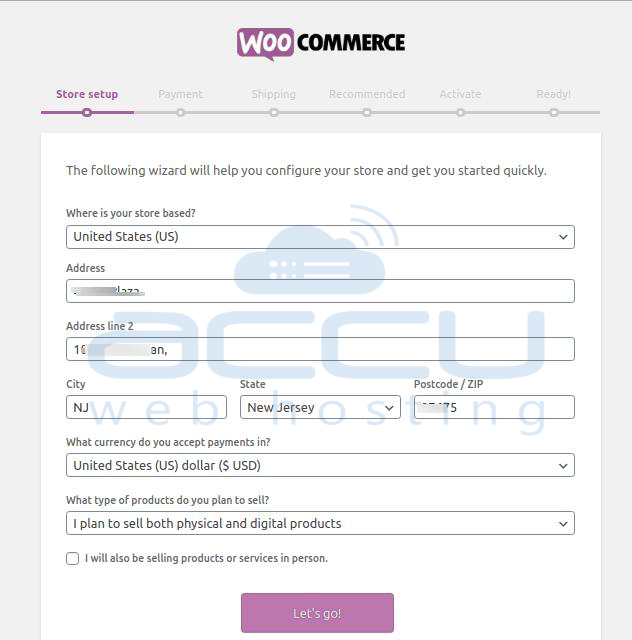
7. Next, select the Continue option.

8. Choose the payment method you want to use to pay for WooCommerce under the Payment option.
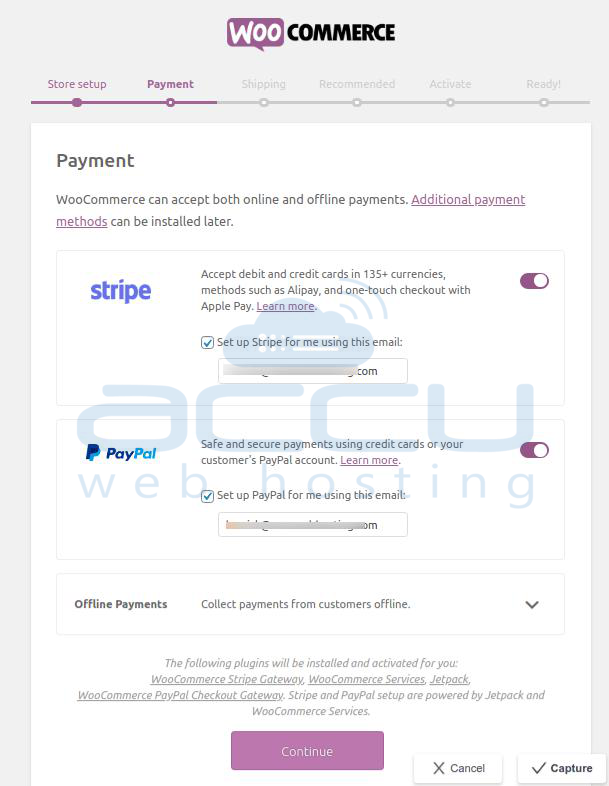
9. Depending on your needs, expand the Offline Payments option and allow other payment options like cheque payment and cash on delivery before clicking the Continue button.
10. From the dropdown menu, choose your shipment method.
Your location will determine how this choice looks.
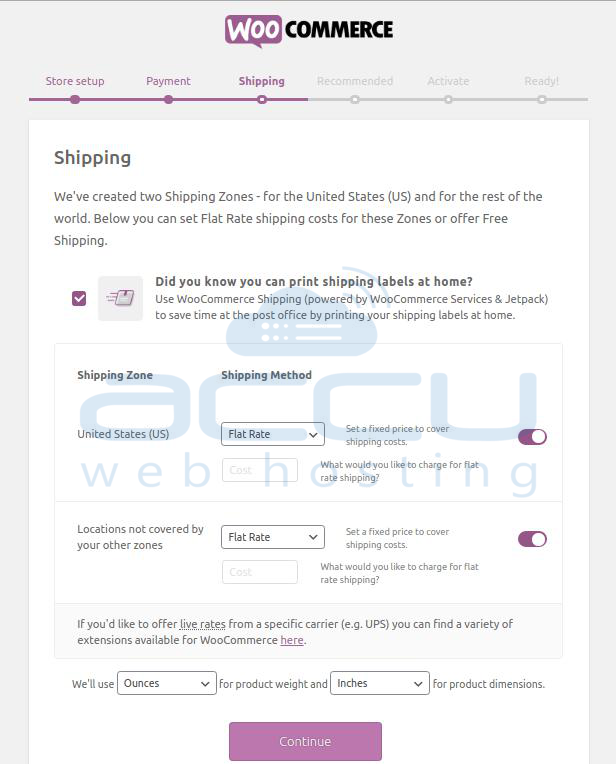
11.If necessary, choose the Additional Features, then press the Continue button.
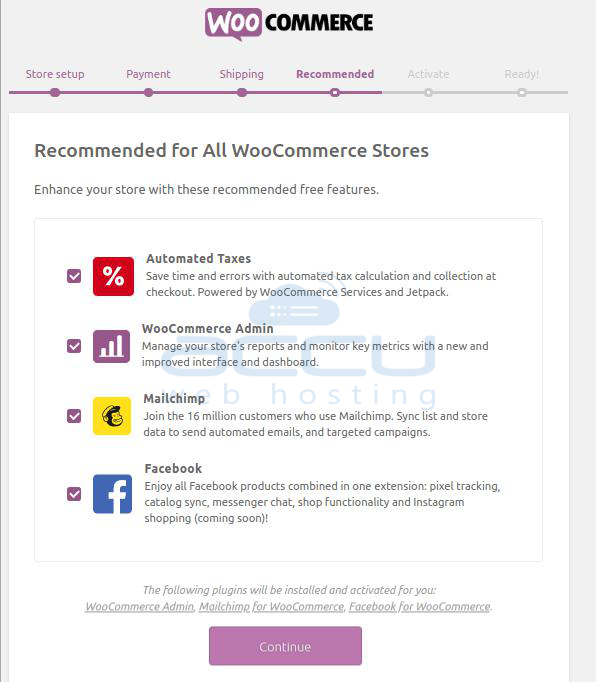
12. You’ve reached the end of the process.
In order to get more services like live rates and automated taxes, it will prompt you to continue with Jetpack. By selecting the Skip this step option, you can skip Jetpack if you’d like not to.
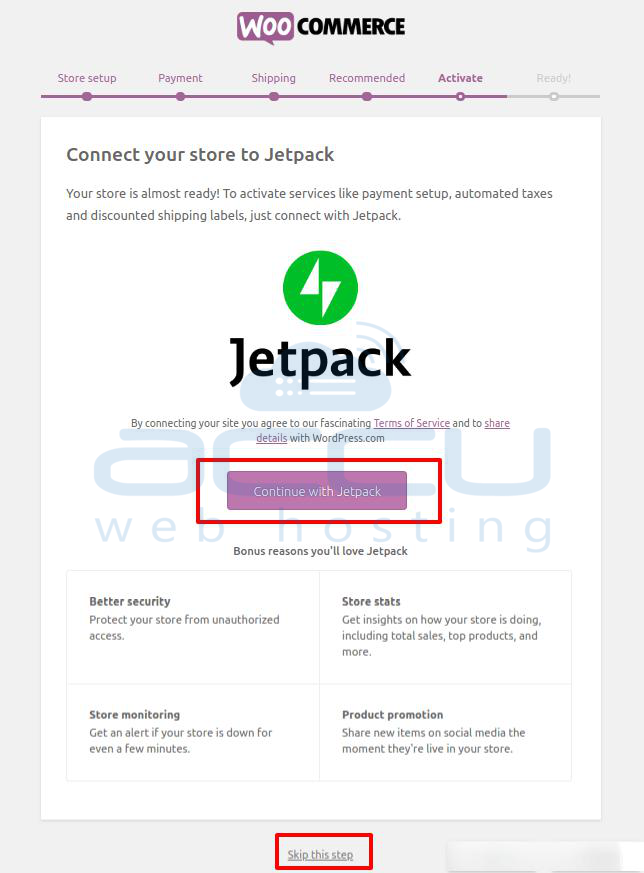
13. Your setup is nearly complete.
14. To get information and updates from WooCommerce, enter your email address.
To explore all the choices, we advise you to visit the WooCommerce official website.
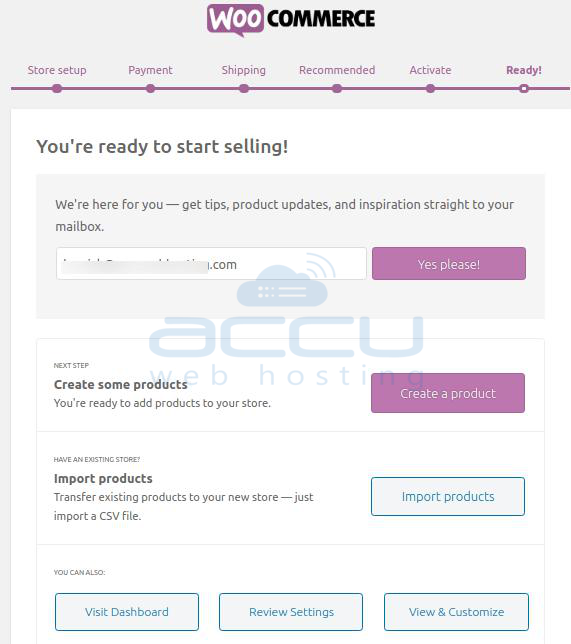
15. You may go to WooCommerce >> Add New and Add New Product to add the product to your store.
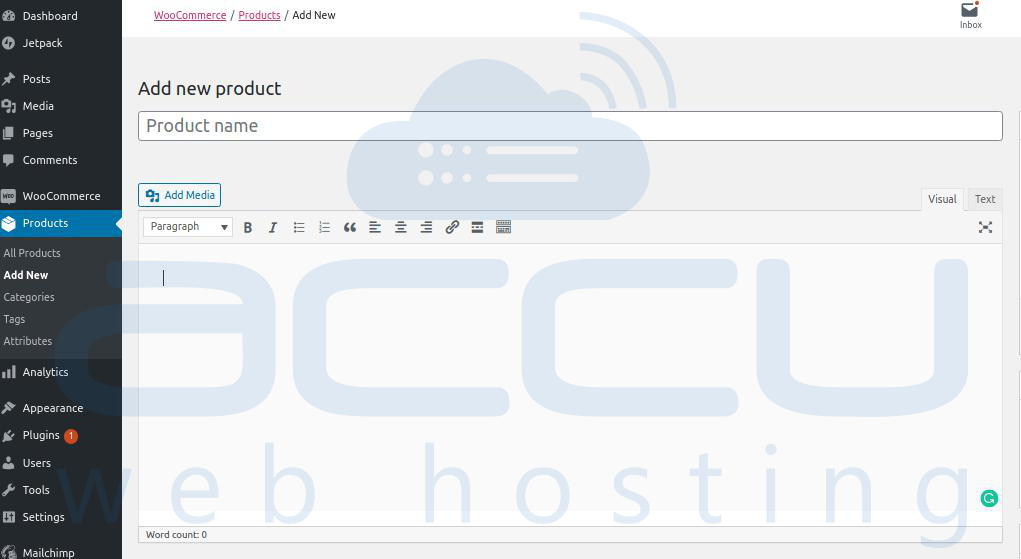
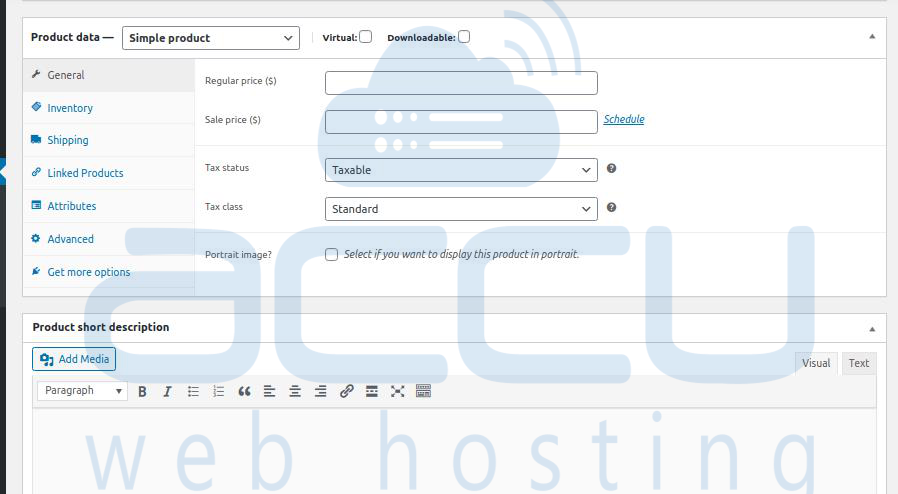
By following all of the above instructions, WooCommerce will have been successfully installed on your WordPress website.


Leave a Reply
You must be logged in to post a comment.